Posts

DYNAMICS 365 CREATE, MANAGE, AND STRUCTURE WEB RESOURCES

Image
Working with Web resources without planning and organizing could lead to many difficulties related to development, maintenance and troubleshooting. In this previous post , we learned how to add and use namespace in JavaScript . This post will show you two areas to structure and organize your web resources . Visual Studio project In this chapter, I will explain how to create and organize Web Resources project in Visual Studio where you can easily work with web resources files and maintain them under a source control Create a new Class Library (.Net Framework) project and enter its name. I Mainly follow this format: <ClientName>.Xrm.WebResources Add a new folder under the project and name it with the prefix you are usin...
DYNAMICS 365 INSERT CUSTOM ENTITY FIELDS IN EMAIL TEMPLATE

Image
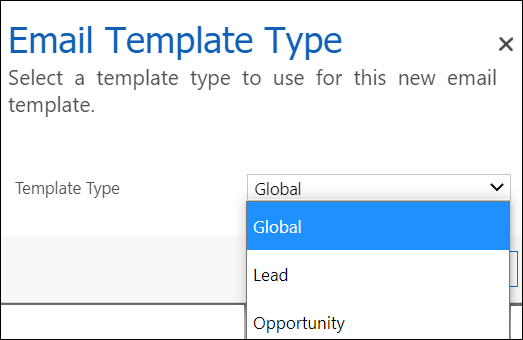
Working with Email Templates is very common and saves a lot of time especially if you have similar emails to send from CRM. The email templates are by default provided for some built-in entities that are listed when you create the template; however, when working with custom entities, it is not straight-forward and you have to do some additional work to make it done. To show you how to add custom entity fields in Email template content, I will create a new custom entity named Project and I will use some fields in order to build the email content In CRM Settings > Templates > Email Templates, create a new template and choose Global for Template Type In the Template screen, enter the Title of the template and the Subject of the email that will be sent To build the email content, ...

DYNAMICS 365 HOW TO DISABLE FIELDS AFTER RECORD CREATION - NO CODE SOLUTION

Image
Last day, I had a task that requires to disable some fields on the form after the record is created. As a developer, you might directly thought in JavaScript; but, there is an easier and faster way to do it with no code needed, Business Rules . In this post, we will see how to disable fields after the record creation using Business Rules Below are the needed steps to achieve this need Go to the specific entity and create a new business rule In the Condition element, choose a field that it will always be filled once the record is created (created on, modified on...) Add the condition if the chosen field Does Not Contain Data => record not yet created ( Modified On Does not contain data , Create On Does not contain data ...) In the True par...

DYNAMICS 365 OVERCOME SOLUTION DESCRIPTION LENGTH LIMITATION

Image
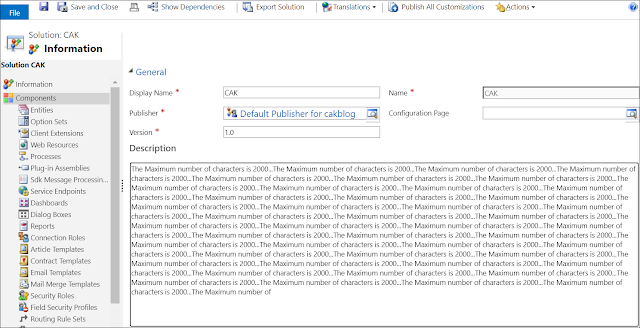
When working with D365 Solutions, you often use the Description field in order to keep track of your solution versions and the changes done through the project, by entering the appropriate details to each version and functionalities. However, and for big projects with many details entered in the Description field, you might encounter an issue which is the 2000 characters limit for the description field ; therefore, you will not be able to enter more details which lead to loss of tracking. In the Classic Interface, you won't be able to enter additional details In the PowerApps maker, you will get the error when you save that the length of the 'description' attribute of the 'solution' entity exceeded the maximum allowed length of '2000' . To overcome this limitation, you can use the OOB Configuration Page of the solution . The C...

DYNAMICS 365 HOW TO COPY PASTE BUSINESS RULES COMPONENTS

Image
Last day, I was working with Business Rules and one of them was quite large and contains many conditions and actions. To speed up my creation of this business rule, I used the Copy/Paste components in Business Rules that exists out-of-the-box. So I decided to write a post about it and share my thoughts. For the sake of this post, I will create a new business rule against the Account entity. This business rule will show/hide fields and make them required based on the Relation Type field. Therefore, similar conditions and actions will exist in order to achieve this requirement. Let's start by setting the initial condition Next, in the right pane, Drag/Drop the components Set Visibility and Set Business Required to the True part of the condition and set t...

DYNAMICS 365 HOW TO CHECK IF BUSINESS PROCESS FLOW (BPF) EXISTS ON A RECORD

Working with Business Process Flows is very popular and requested for many scenarios. But it is sometimes tricky especially when you have some treatment to do in JavaScript. Some of these scenarios might be changing the BPF phase if a field is set to a specific value or show/hide fields/tabs based on the BPF phase ... that require some JavaScript code in order to achieve them. For some developers, it is straight forward to capture the process stage by entering the following lines of code. var stage = formContext.data.process.getActiveStage(); var stageName = stage.getName(); if (stageName == "<somevalue>") { //Do something } This is enough and will perfectly work for new records, since the BPF will be automatically assigned to the record. However, for old records that exist before...

ADD PEN CONTROL TO CAPTURE CUSTOMER SIGNATURE ON THE FORM

Image
Many people don't know that Pen control exists as a Out of the box feature in Dynamics 365. The Pen control will allow the user to capture customer signature on a record, and it is available for both built-in and custom entities. In this post, I will go through the steps and show you how to Add and Use the Pen control in Dynamics 365 forms that allow you to capture the customer signature . For the sake of this post, I created a multi-line field in the Account entity and you can follow the below steps to enable the Pen control to capture the customer signature . Put the field in a specific form section Open the Fields Properties > Formatting tab and set the number of rows for better appearance (i.e: 5) Go to Controls tab > Add Control ...

DYNAMICS 365 CREATE AUTO-NUMBER FIELD WITHOUT CODE

Image
Auto-numbering was, is, and will stay a main request to a lot of organizations when it comes to records' uniqueness whether working in Sales, Customer Service, or any other area. As for the consulting company, auto-numbering was a development task, where the developer has to write a bunch of code and test it in order to achieve this mission. However, in PowerApps and CDS, you can now create auto-number fields without writing a single line of code. Login to your PowerApps maker https://make.powerapps.com and open the solution you are working with Open the entity you want to create the auto-number field and create new field Note: I am using the Account entity, but you can use any entity In the right Pane, select the Data Type dropdown > A...

DYNAMICS 365 ADD EMOJIS IN OPTION SETS

Image
How professional to provide the end users, a user-friendly and easy interface, as well as meaningful and comprehensive layout. Sometimes, you think that showing a visual effect is a better and more interesting way to help users in their daily work. Here comes our topic of today, which is adding Emoji in Dynamics 365 and more specifically making the option-sets fields more attractive by displaying emojis in the option-set items . This post will show you how to add emojis in Option-sets fields so you can make more attractive and pretty visual. All you need is to simply get your emojis from a website like https://getemoji.com and a copy/paste into your option-set field. For the sake of this post, I created a new option-set field Customer Satisfaction on the case entity that contains the below options: Very Satisfied ...

HOW TO CONNECT TO DYNAMICS 365 ENVIRONMENT WITH OAUTH AUTHENTICATION

Image
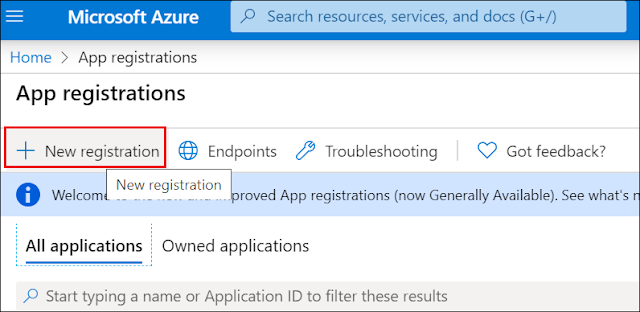
Previously, we were applying the Office 365 authentication method to connect to the D365 environment by using the Dynamics 365 URL , User Name and Password in order to build the connection string and create the CRM Service as per the below sample. string connectionString = "Url=" + Url + "; Username =" + UserName + "; Password=" + Password + "; authtype=Office365"; CrmServiceClient crmService = new CrmServiceClient(connectionString); However, Microsoft has announced the deprecation of the Office 365 connection and declared to connect to Dynamics 365 with Oauth authentication method instead. In this blog post, I will detail the needed steps that should be followed to connect to the Dynamics 365 environment using the OAUTH authentication . Below are the three areas we have to configure for the OAUTH A...