DYNAMICS 365 INSERT CUSTOM ENTITY FIELDS IN EMAIL TEMPLATE
Working with Email Templates is very common and saves a lot of time especially if you have similar emails to send from CRM.
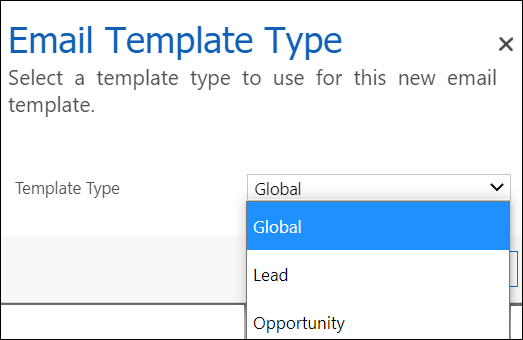
The email templates are by default provided for some built-in entities that are listed when you create the template;
however, when working with custom entities, it is not straight-forward and you have to do some additional work to make it done.
To show you how to add custom entity fields in Email template content,
I will create a new custom entity named Project and I will use some fields in order to build the email content
- In CRM Settings > Templates > Email Templates, create a new template and choose Global for Template Type
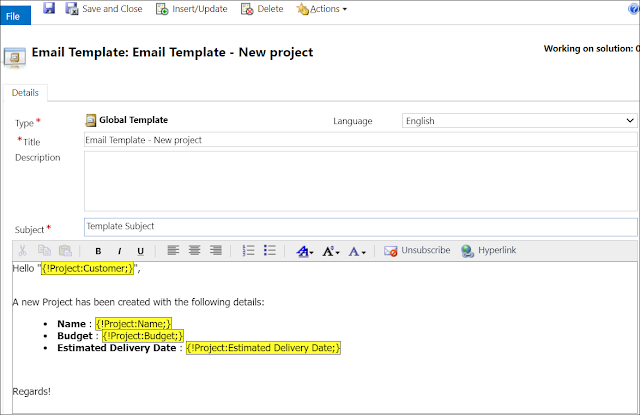
- In the Template screen, enter the Title of the template and the Subject of the email that will be sent
- To build the email content, I need the Customer name (lookup), Project name (text), Budget (currency), and Estimated Delivery Date (date time)
-
To do so, you have to use the following format in order to resolve the values of the needed fields: {!EntityLogicalName:FieldLogicalName;}
For my example:- Customer Name (lookup): {!new_project:new_customerid/@name;}
- Project name (text): {!new_project:new_name;}
- Budget (currency): {!new_project:new_budget;}
- Estimated Delivery Date (Date Time): {!new_project:new_estimateddeliverydate/@date;}
-
Click Save and you will notice that the dynamic values will be resolved displayed in yellow
-
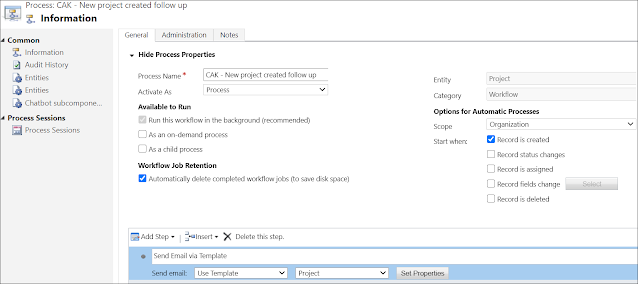
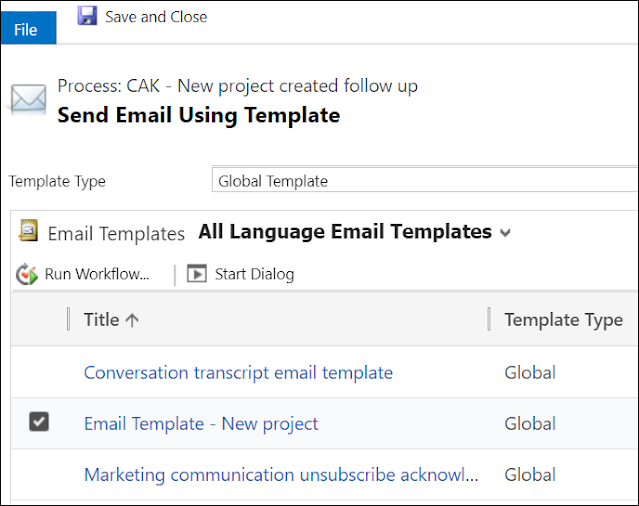
Let's test it by creating a new workflow and sending an email when a new project record is created
-
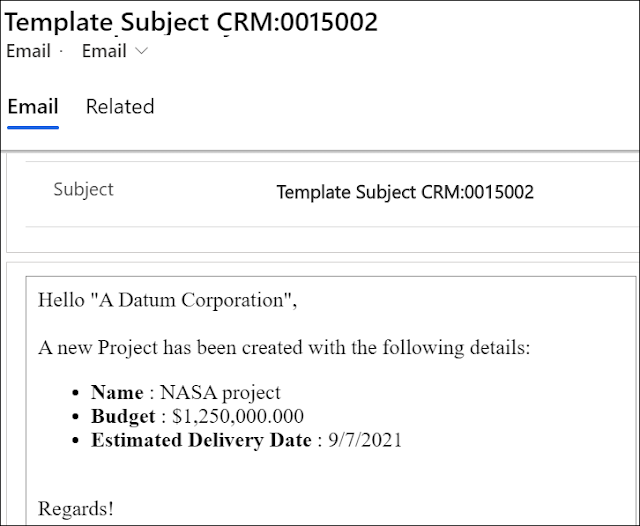
Create a new project record and check the Activities.
As expected, the correct values of the project record will be properly displayed in the email content
Bonus Tips:
- You can also use the template directly from the email activity screen by clicking Insert Template
- To display option set values: {!EntityLogicalName:FieldLogicalName/@name;}
- To display Date values: {!EntityLogicalName:FieldLogicalName/@date;}
- To display Time values: {!EntityLogicalName:FieldLogicalName/@time;}
- To display default text value: {!EntityLogicalName:FieldLogicalName; Default text}
- Use the button Insert/Update in the template to choose fields from the user entity only
Hope This Helps!



Comments
Post a Comment