Posts

MANAGE POWERAPPS PORTAL

Image
In this previous post , we saw how to create and provision PowerApps Portal . In this post, we will see how to Manage a PowerApps portal and have a look on the different options and commands of the PowerApps Portal . In the Apps list, select the PowerApps portal App to show the command bar or click the ellipsis to display the different commands The Edit command will open the Power Apps portals Studio where you will be able to edit and customize the portal website. The Studio is divided into the following sections: The header or the command bar where you can create new page, delete a component, synchronize your changes to the Dataverse, or browse the portal The footer wil...

HOW TO CREATE, SET UP AND PROVISION POWERAPPS PORTAL

Image
With PowerApps portals , you can give the opportunity not only for internal users but for external users as well to work and interact with the data stored in you Microsoft Dataverse environment. In the following steps, we will see how to create, set up and provision a PowerApps portal Sign in to your Power Apps environment Under Make your own app in the Home menu or Three ways to make an App in the Apps menu, select Portal from blank If the selected environment does not contain the needed pre-requisites to provision a portal app, a message is displayed suggesting to select another environment or to create a new one. Check this post if you want to create a new Dynamics 365 trial environment In the new popup window, enter a name and address for the p...

HOW TO SHOW FIELDS TOOLTIP IN FORM

Image
In Dynamics 365, when creating / editing entity fields, there is a property that is largely ignored and rarely used by the customizer. This property is the Description that is displayed when seeing the list of fields in the customizations. Other than the customizations, the Description property is shown as a tooltip on the field when the user hovers over a field label in the form. This feature is an OOB one and does not need any additional development, and will avoid to enter long field label. You can also use the Description property to better clarify and explain the purpose of the field and improve the understanding of how it should be used. In the below steps, we will see how to set up tooltip for the fields : Go to https://make.powerapps.com Open your solution that contains your needed fields to add/edit the t...

HOW TO CREATE AND SETUP NEW DYNAMICS 365 TRIAL ENVIRONMENT

Image
Creating and setting up a new Dynamics 365 trial environment is an easy task with a straight forward steps. However, it has been changed with PowerApps and a new way exists to create the environment. In this post, I will walk through the steps and show you the new method on how to create and setup a new Dynamics 365 Trial Environment . In the following steps, you will notice that some of them are still the same, while others have been changed. Access the trial URL using the following link https://trials.dynamics.com Click Try for free in the Dynamics 365 Sales App you want to have in your environment In the popup, enter any text in the box and click Start your free trial An error message will appear telling you to enter a valid work account. Otherwise, Cli...

HOW TO MAP LOOKUP FIELDS INTO CURRENT RECORD

Image
As a Dynamics 365 consultant, you absolutely faced the scenario when changing a lookup field on the form, to map fields of the record chosen in the lookup into fields on the main form you are working on. In this post, I will show you some methods how to map fields from a lookup into the main record fields . Based on the requirements, you can apply the appropriate approach that is suitable for your need. JavaScript The first approach is to use JavaScript that requires a technical consultant to write the needed functions that will be executed on change event of the lookup field. What happens when you apply this approach A retrieve request should be done to get the values from the lookup that will be set on the main...

HOW TO USE TOGGLE CONTROL FOR TWO OPTIONS FIELDS

Image
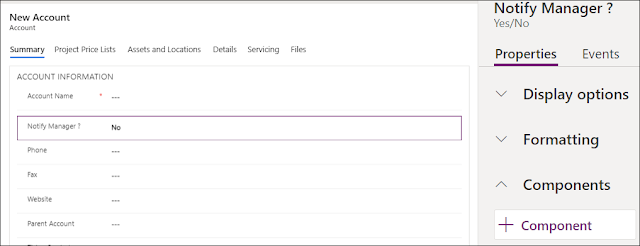
In this post, I will talk about how to use the Toggle control for better display in order to optimize and increment user-friendliness of the system. This control can be used with two options type fields. Therefore, to add the Toggle control on the form, you need to add a two options field on the form. Under the field's properties, in the Component section, click the + sign to Add a new control From the list, select Toggle control Check where you want to show this control, and click Done Once published, you can see the result on the form For more user experience and enhancements ideas, you can check this link for some custom controls that can be used like: ...

HOW DOES NUMBER INPUT AND STAR RATING CONTROLS WORK IN DYNAMICS 365

Image
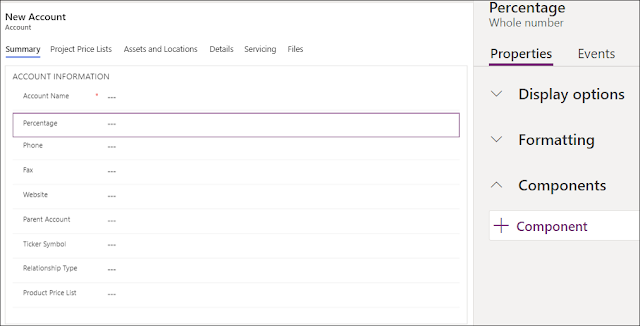
In order to optimize and increment user adoption and interaction, it is recommended to bring some of the optimized and available controls into the system. This way, the users will have more user-friendly interface to deal with. Therefore, using the custom controls is highly recommended to achieve this. In this post, we will have a look at how to use Number input control and Star rating control with numeric data types like number , currency , decimal . To add the Input Number control on the form, you need to add a numeric field Under the field's properties, in the Component section, click the + sign to Add a new control From the list, select Number Input control In the Step, set the number you wish to add or subtract...

DYNAMICS 365 OPTION SET FIELD CONTROL

Image
Every customer wants to have a user friendly interface and easy-to-use system in order to help the users to be more productive and effective in their daily work. Providing a good user experience will increase the chances of meeting these goals. In this post, I will talk about enhancing the user experience for option sets fields on the form by using the Option Set control . In the below steps, you will see how to enable the Option Set Control and how the result is going to be displayed on the form. In the form, open the option set field properties Click the Controls tab > Add control In the list of controls, select Option Set and click Add Save and Publish the form You can now see the Option Set Control in action on the form ...

HOW TO ADD AND USE RICH TEXT EDITOR IN DYNAMICS 365 FORM

Image
What is a  Rich Text Editor control ? A Rich Text Editor control will allow you to enter formatted text and the ability to include images with minor effort where the input/output is HTML. It will enhance the user experience and increase productivity. The below steps will show you how to enable the Rich Text Editor control for multiline text fields in Dynamics 365 form. In the form customizations, open the properties of a multiline text field Go to Controls tab > Add control Scroll down, and select Rich Text Editor Control Click OK, Save, then publish Once published, the user can now format the text in the field and add images as well ...

PORTAL USER LAST LOGIN DATE AND TIME

Image
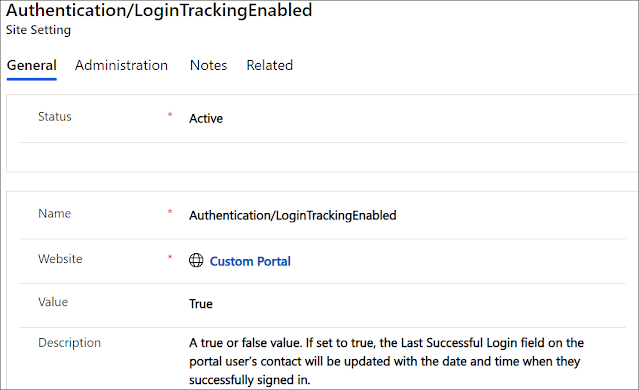
Many clients wish to have a look on how their systems are performing and especially the ones facing the end users, therefore, they sometimes need to track the peak time when the users are connected to their systems to do some statistics, analysis, and take actions based on the data collected. The same applies to the PowerApps portal which is our topic in this post, where I will show you how to get the user last login date to the portal . As you know, users that connect to the portal, are saved in the Dynamics 365 as contact records, and to save the last login date to the portal, a new date/time field named Last Successful Login will be created in the contact entity during the portal provisioning. In order to fill this field by the appropriate date time when a portal user has logged in, a setting should be set and enabled Open the portal settings entity ...

HOW TO ENABLE AUTO COMPLETE CONTROL IN DYNAMICS 365 FORM

Image
The data existing in D365 application represents the most important thing to any customer, and all of us are helping clients to better use and improve the data entry to be more consistent and cleaner as much as possible. Most fields allow users to enter specific type/format of data, for example, an option set field will provide a list of items to select between them, the lookup field will provide data from another entity, the number field will limit the data to be numeric.... However, the main concern will be on the text fields where the users can enter any info and save it. Here, the data might start to become inconsistent and can lead to erroneous outcome in some scenarios. Therefore, in order to maintain the consistency of data entered in the text fields especially for the ones that present sensitive info to the business, you can add the Auto-complete control where it will start giving suggestions and ...