MANAGE POWERAPPS PORTAL
In this previous post, we saw how to create and provision PowerApps Portal.
In this post, we will see how to Manage a PowerApps portal and have a look on the different options and commands of the PowerApps Portal.
-
In the Apps list, select the PowerApps portal App to show the command bar or click the ellipsis to display the different commands
-
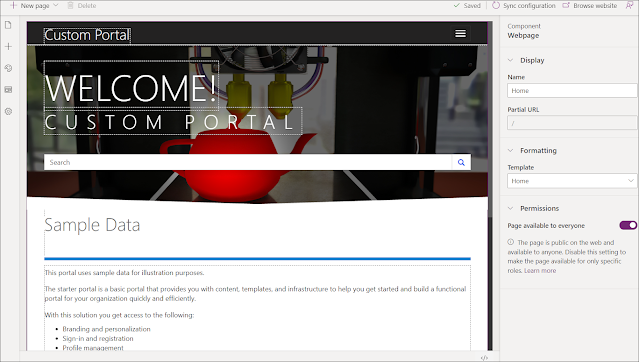
The Edit command will open the Power Apps portals Studio where you will be able to edit and customize the portal website.
The Studio is divided into the following sections:
- The header or the command bar where you can create new page, delete a component, synchronize your changes to the Dataverse, or browse the portal
- The footer will show the save status and give you the ability to edit the code of the selected component in the page
- The left menu or the Toolbelt where you can see the webpages and manage them, you can as well see the templates and access the portal themes and page settings
- The page content or Canvas that contains the different components of the page
- The right section or the properties pane where you can check the properties of the page or the selected components and edit them as needed
-
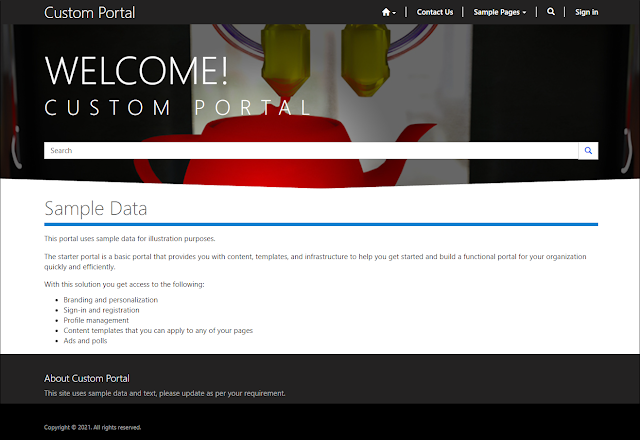
The Browse command will open the Portal website in the browser and you can navigate through the pages of the portal
-
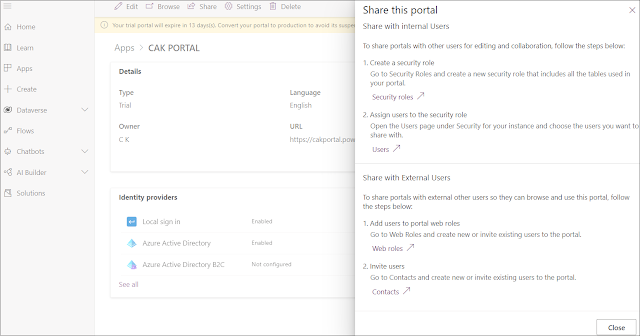
The Share command will give you the options to share the Portal with internal staff or external users
- For internal staff, you will be redirected to the security roles and contact entities, where you can adjust/create the security role to give the needed permissions on the portal entities like entity form, entity list... These security roles will than be assigned to the appropriate users that should have access on the portal entities to manage them
- For external users, you will be redirected to the web roles and contact entities, where you can create web roles in order assign them to the contact records that will have access on the portal website
-
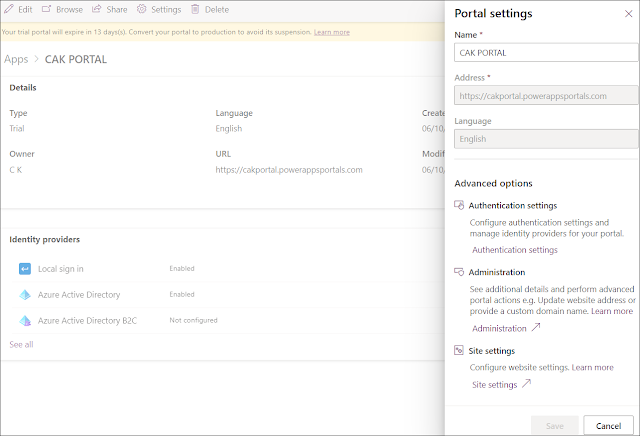
The Settings command will allow you to
- Check the portal setting like the Name, URL, and the Language and change the name if needed
- Check the authentication settings where you can manage the identity providers you want to configure for the portal
- Open the Power Apps portals admin center where you can apply many actions in it, and set up integrations like SharePoint and Power BI
- Open the Site Settings entity where you can add or modify settings that are aimed to change some behavior or style for specific areas of the portal without changing the code
-
The Delete command will delete the portal and its hosted resources without affecting the portal solutions in the environment.
If you want to delete all the portal configuration, you can go to the portal Website entity and delete the appropriate portal record -
The Details command will open the portal information like Type, URL, and Language, in addition to the enabled and configured identity providers
You can check this page
for more portal-related articles like:
Hope This Helps!


Comments
Post a Comment