DYNAMICS 365 HOW TO DISABLE FIELDS AFTER RECORD CREATION - NO CODE SOLUTION
Last day, I had a task that requires to disable some fields on the form after the record is created.
As a developer, you might directly thought in JavaScript; but, there is an easier and faster way to do it with no code needed, Business Rules.
In this post, we will see how to disable fields after the record creation using Business Rules
Below are the needed steps to achieve this need
- Go to the specific entity and create a new business rule
- In the Condition element, choose a field that it will always be filled once the record is created (created on, modified on...)
- Add the condition if the chosen field Does Not Contain Data => record not yet created (Modified On Does not contain data, Create On Does not contain data...)
- In the True part of the condition, add the Lock/Unlock element for the field you want to Enable and repeat it to all the necessary fields
- In the False part of the condition, add the Lock/Unlock element for the same fields and choose to Disable the necessary fields
-
Set the rule scope to All Forms and Activate it
-
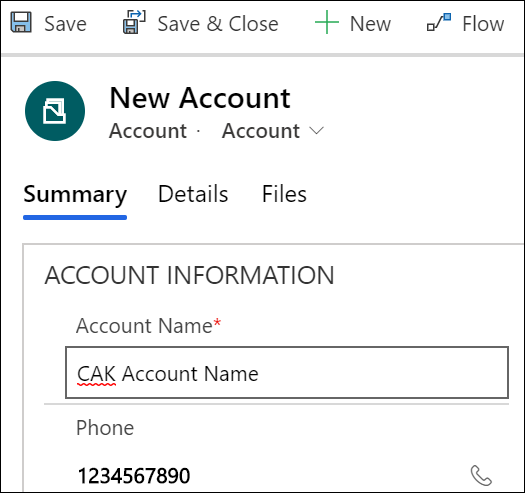
When you click New button, you will be able to enter values in the fields
-
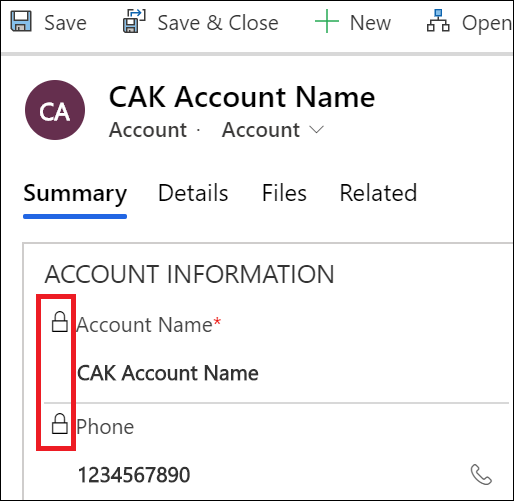
After the record is created, the fields will be locked and you will not be able to modify them
Bonus Tips:
- You can choose built-in fields as well as custom fields. Personally, I prefer built-in field such as Created On, Modified On...
- Make sure that all fields that are used in the Business Rule are placed on the form
- To speed up the business rule creation, you can copy/paste the components as detailed in my previous post
Hope This Helps!


Comments
Post a Comment